字符串
定义:串是由0个或多个字符组成的有限序列,又名字符串
1.空串:没有字符,直接由””表示
2.主串与子串:”hello”是”helloworld”的子串,”helloworld”是”hello”主串
3.字符串比较:比较字符串里每个字符的ASCII码大小,没有意义,一般看是否相等
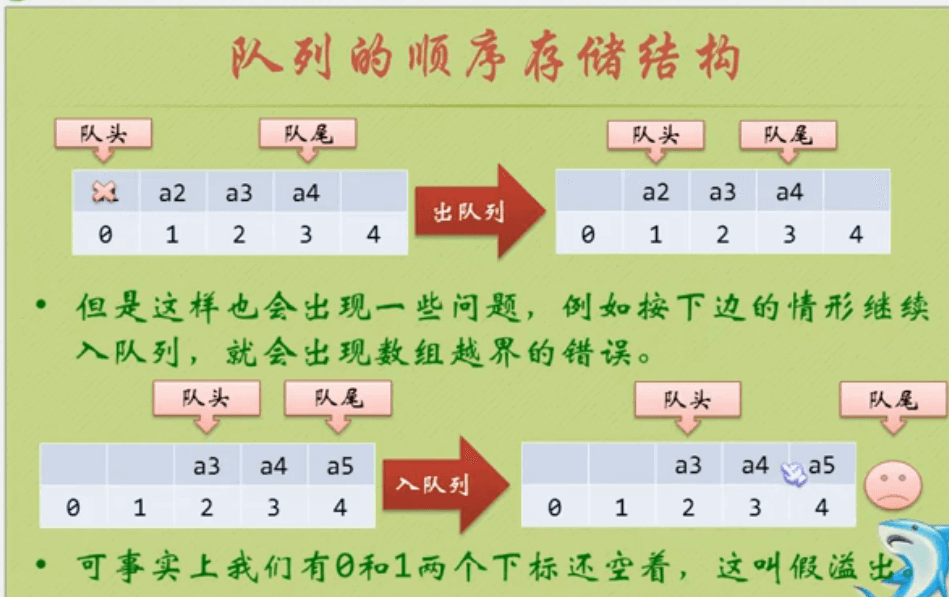
4.存储结构
顺序存储:用一组地址连续的存储单元来存储串中的字符序列,
按照预定义大小,为每个定义的字符串变量分配一个固定长度的存储区,一般用定长数组来定义
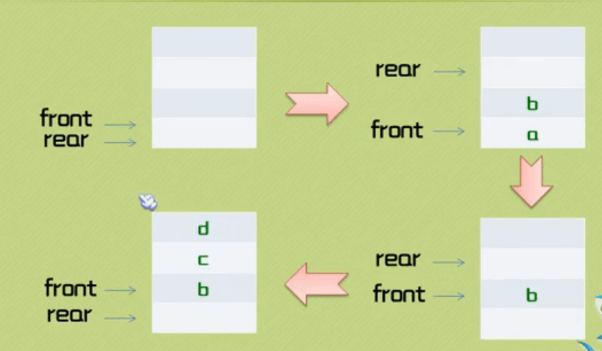
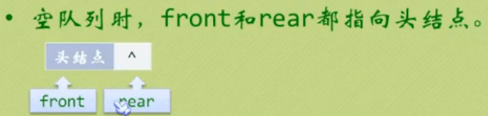
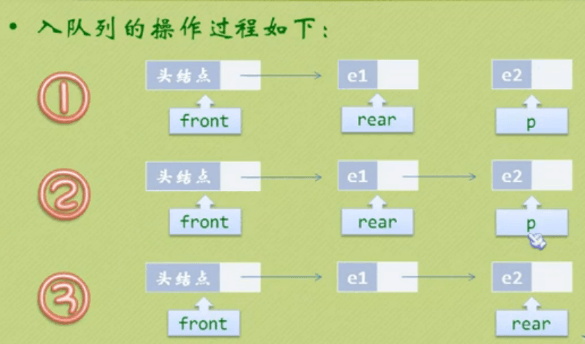
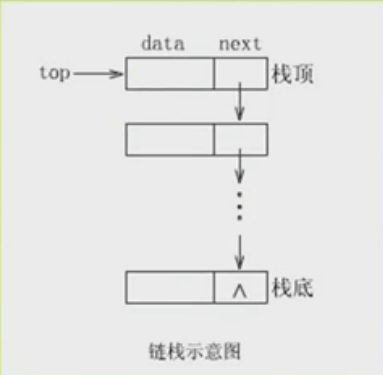
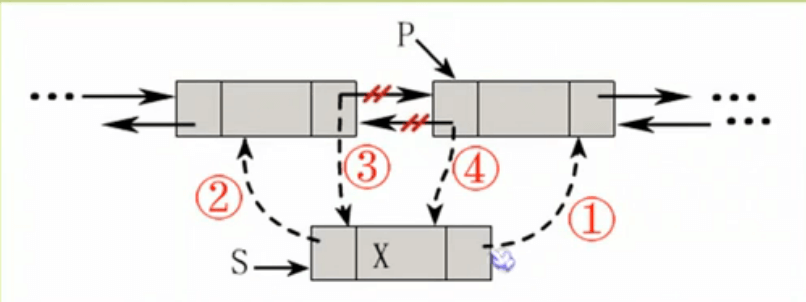
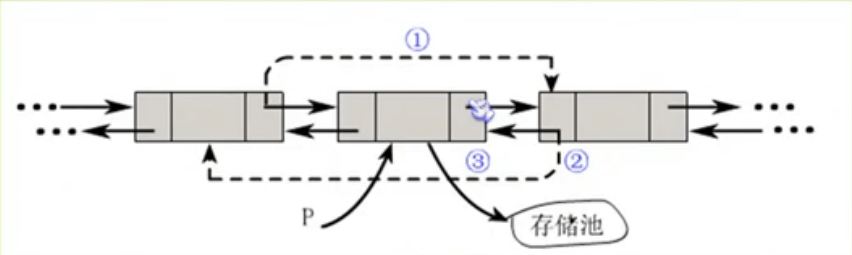
链式存储:不常用
5.BF算法:
有两个字符串S和T,长度为N和M,首先S[1]和T[1]比较,若相等,则再比较S[2]和T[2],一直到T[M-1]为止;
若S[1]和T[1]不等,则T向右移动一个字符的位置,再依次进行比较
6.字符串模式匹配:依据BF算法,S是主串,T是子串这种定位操作即字符串模式匹配
BF算法
1 | var string1="hellohannahworld"; |