Karma test
Karma是由Google团队开发的一套前端测试运行框架。它不同于测试框架(例如jasmine,mocha等),运行在这些测试框架之上。主要完成以下工作:
Karma启动一个web服务器,生成包含js源代码和js测试脚本的页面;
运行浏览器加载页面,并显示测试的结果;
如果开启检测,则当文件有修改时,执行继续执行以上过程。
搭建测试环境
npm install -g karma-cli //让全局都可以运行karma的命令行,命令行工具
npm i karma –save-dev //只在当前项目中使用karma
npm install //安装项目的依赖 package.json1
2
3
4
5
6
7"devDependencies": {
"karma": "^1.7.0",
"karma-chrome-launcher": "^2.2.0",
"karma-mocha": "^1.3.0",
"mocha": "^3.5.0",
"should": "^11.2.1"
}
karma init //在cmd中运行该命令,构建karma.conf.js文件,运行后会询问相关问题然后生成karma.conf.js文件1
2
3
4
5
6
7
8
9
10
11
12
13
14
15
16
17
18
19
20
21
22
23
24
25
26
27
28
29
30
31
32
33
34Which testing framework do you want to use ?
Press tab to list possible options. Enter to move to the next question.
> mocha //选择要使用的框架,不能直接输入,是选择题,点击键盘箭头可更改选项
Do you want to use Require.js ?
This will add Require.js plugin.
Press tab to list possible options. Enter to move to the next question.
> no //是否add Require.js plugin
Do you want to capture any browsers automatically ?
Press tab to list possible options. Enter empty string to move to the next quest
ion.
> Chrome //选择用哪个浏览器打开测试页,也是选择题,不能输入
>
What is the location of your source and test files ?
You can use glob patterns, eg. "js/*.js" or "test/**/*Spec.js".
Enter empty string to move to the next question.
> src/*.js //添加要测试的代码的路径,不是测试用例代码的路径,同时,代码中用到的其他文件也在这里同时添加,
11 08 2017 15:03:13.822:WARN [init]: There is no file matching this pattern.
> // 回车可以切换下一行继续添加,连续回车进入下一个问题
Should any of the files included by the previous patterns be excluded ?
You can use glob patterns, eg. "**/*.swp".
Enter empty string to move to the next question.
>
Do you want Karma to watch all the files and run the tests on change ?
Press tab to list possible options.
> yes //是否跟所有文件自动开启测试
Config file generated at "G:\css\homework1\karma.conf.js".
karma.conf.js文件1
2
3
4
5
6
7
8
9
10
11
12
13
14
15
16
17
18
19
20
21
22
23
24
25
26
27
28
29
30
31
32
33
34
35
36
37
38
39
40
41
42
43
44
45
46
47
48
49
50
51
52
53
54
55
56
57
58
59
60
61
62
63
64
65
66
67
68
69
70
71
72
73
74
75
76module.exports = function(config) {
config.set({
// base path that will be used to resolve all patterns (eg. files, exclude)
basePath: '',//根路径,后面配置的基本所有相对路径都会根据这个路径来构造。
// frameworks to use 使用到的框架
// available frameworks: https://npmjs.org/browse/keyword/karma-adapter
frameworks: ['mocha'],
// list of files / patterns to load in the browser 将会在浏览器里面执行的代码
files: [
'node_modules/should/should.js',
'js/*.js',
'quz/*.js',
'test/*.js'
],
// list of files to exclude 需要从 files 中排除掉的文件
exclude: [
],
// preprocess matching files before serving them to the browser需要做预处理的文件,以及这些文件对应的预处理器。
// available preprocessors: https://npmjs.org/browse/keyword/karma-preprocessor
preprocessors: {////此处就可以将 coffee 、 ES6 等代码转换一下。
'js/*.js': ['coverage'],//测试覆盖率
'quz/*.js': ['coverage']//测试覆盖率
},
// test results reporter to use 测试结果报告器
// possible values: 'dots', 'progress'
// available reporters: https://npmjs.org/browse/keyword/karma-reporter
reporters: ['progress', 'coverage'],
// 覆盖率报告器配置
coverageReporter: {
type : 'lcov', //html格式会生成html文件,lcov格式可以和coveralls结合生成coveralls徽章
dir : 'coverage/'
},
// web server port 服务器端口号
port: 9876,
// enable / disable colors in the output (reporters and logs)
colors: true,
// level of logging 日志级别
// possible values: config.LOG_DISABLE || config.LOG_ERROR || config.LOG_WARN || config.LOG_INFO || config.LOG_DEBUG
logLevel: config.LOG_INFO,
// enable / disable watching file and executing tests whenever any file changes 启用/禁用监视文件变化重新执行测试的功能
autoWatch: true,
// start these browsers 使用的浏览器
// available browser launchers: https://npmjs.org/browse/keyword/karma-launcher
browsers: ['Chrome'],
// Continuous Integration mode true测试一次就结束,false测试完一直处于测试状态
// if true, Karma captures browsers, runs the tests and exits
singleRun: true,
// Concurrency level
// how many browser should be started simultaneous
concurrency: Infinity
})
}
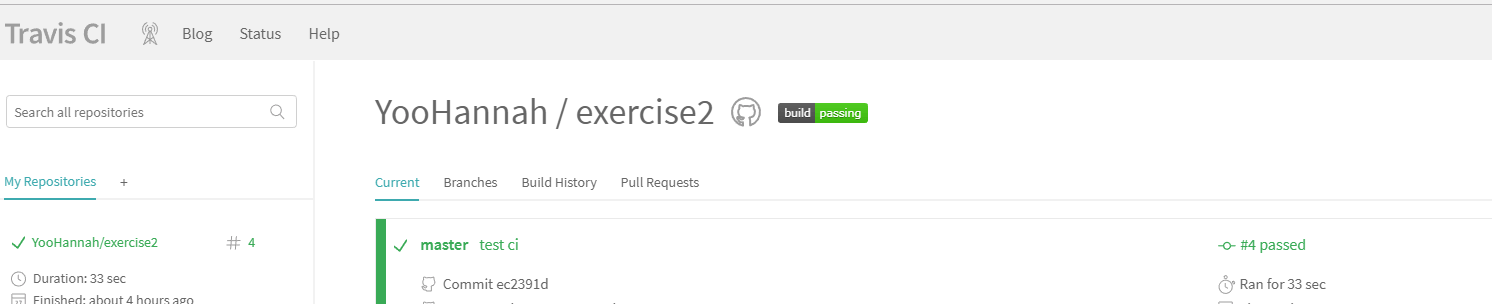
集成测试Travis CI
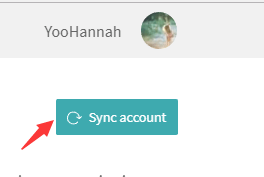
Travish CI使用
通过Travis CI测试我们可以获得一个测试通过的标志 ,可以将它放在github仓库readme.md文件里面
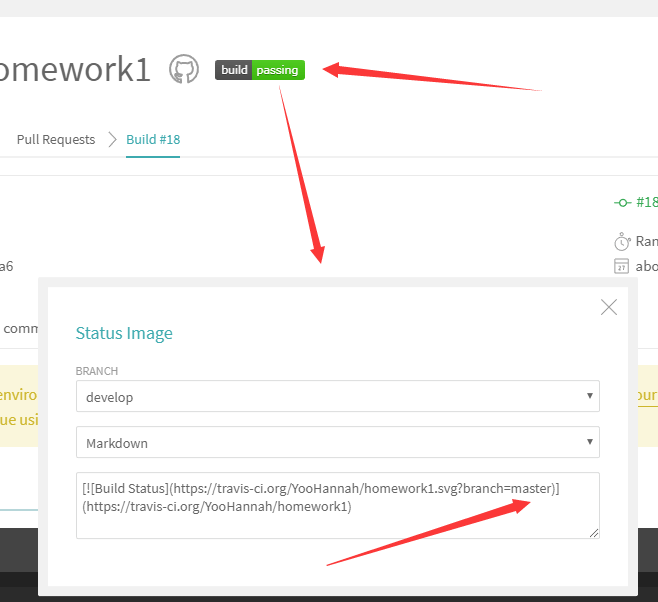
更改链接中branch的值可以获得对应分支的测试结果
测试代码覆盖率 Coverage
衡量测试脚本的质量–代码覆盖率:测试中运行到的代码占所有代码的比率
安装测试覆盖率工具
npm i –save-dev karma-coverage
修改配置文件karma.conf.js1
2
3
4
5
6
7
8
9
10
11
12
13
14
15// modified
preprocessors: {
'src/**/*.js': ['coverage'], //要测试的功能代码路径:['coverage'] 多个文件夹就逗号隔开,按格式写下去
'js/*.js': ['coverage'],
'quz/*.js': ['coverage']
},
//modified
reporters: ['progress', 'coverage'],
// add
coverageReporter: {
type : 'html',
dir : 'coverage/'
},
运行karma start,会新增coverage文件夹,里面只有一个浏览器名的文件夹,里面是根据preprocessors添加的路径生成对应的文件夹和其他文件,
其他文件里面有index.html文件,是整个测试的测试报告,文件夹里是每个文件的覆盖测试结果和代码具体的覆盖情况
注意:如果不想将测试结果上传github,记得更改.gitignore文件,将coverage文件夹忽略掉
获取覆盖率标志
github 仓库经常会看到这个标志
就是说项目的测试覆盖率是91%,要获取这个标志我们需要将测试覆盖率放到Coveralls上
安装 coveralls方便我们在Travis CI上测试完之后将结果上传
npm i coveralls –save-dev
更改karma.conf.js
coverageReporter: {
type : ‘lcov’, //将html改为lcov
dir : ‘coverage/‘
},
接下来操作步骤可以有两种
方法一:
仅更改 package.json文件,不保留测试命令karma start
更改package.json的scripts1
2
3"scripts": {
"test": "./node_modules/karma/bin/karma start --browsers Firefox --single-run && find coverage -name lcov.info -print0 | xargs -0 cat | ./node_modules/coveralls/bin/coveralls.js && rm -rf ./coverage"
}
方法二:
更改package.json文件,保留测试命令karma start1
2
3
4"scripts": {
"test": "karma start",
"report": "find coverage -name lcov.info -print0 | xargs -0 cat | ./node_modules/coveralls/bin/coveralls.js && rm -rf ./coverage"
}
也要更改.travis.yml文件,添加以下语句1
2after_success:
- "npm run report"
然后push代码,等Travi CI 完成测试后,我们可以在Coveralls上获取标志,
在总的测试结果那个页面不是具体某次提交的页面获取
点击EMBED可以获取不同格式的标志代码,
复制粘贴MARKDOWN 格式可以放在readme.md文件中直接使用